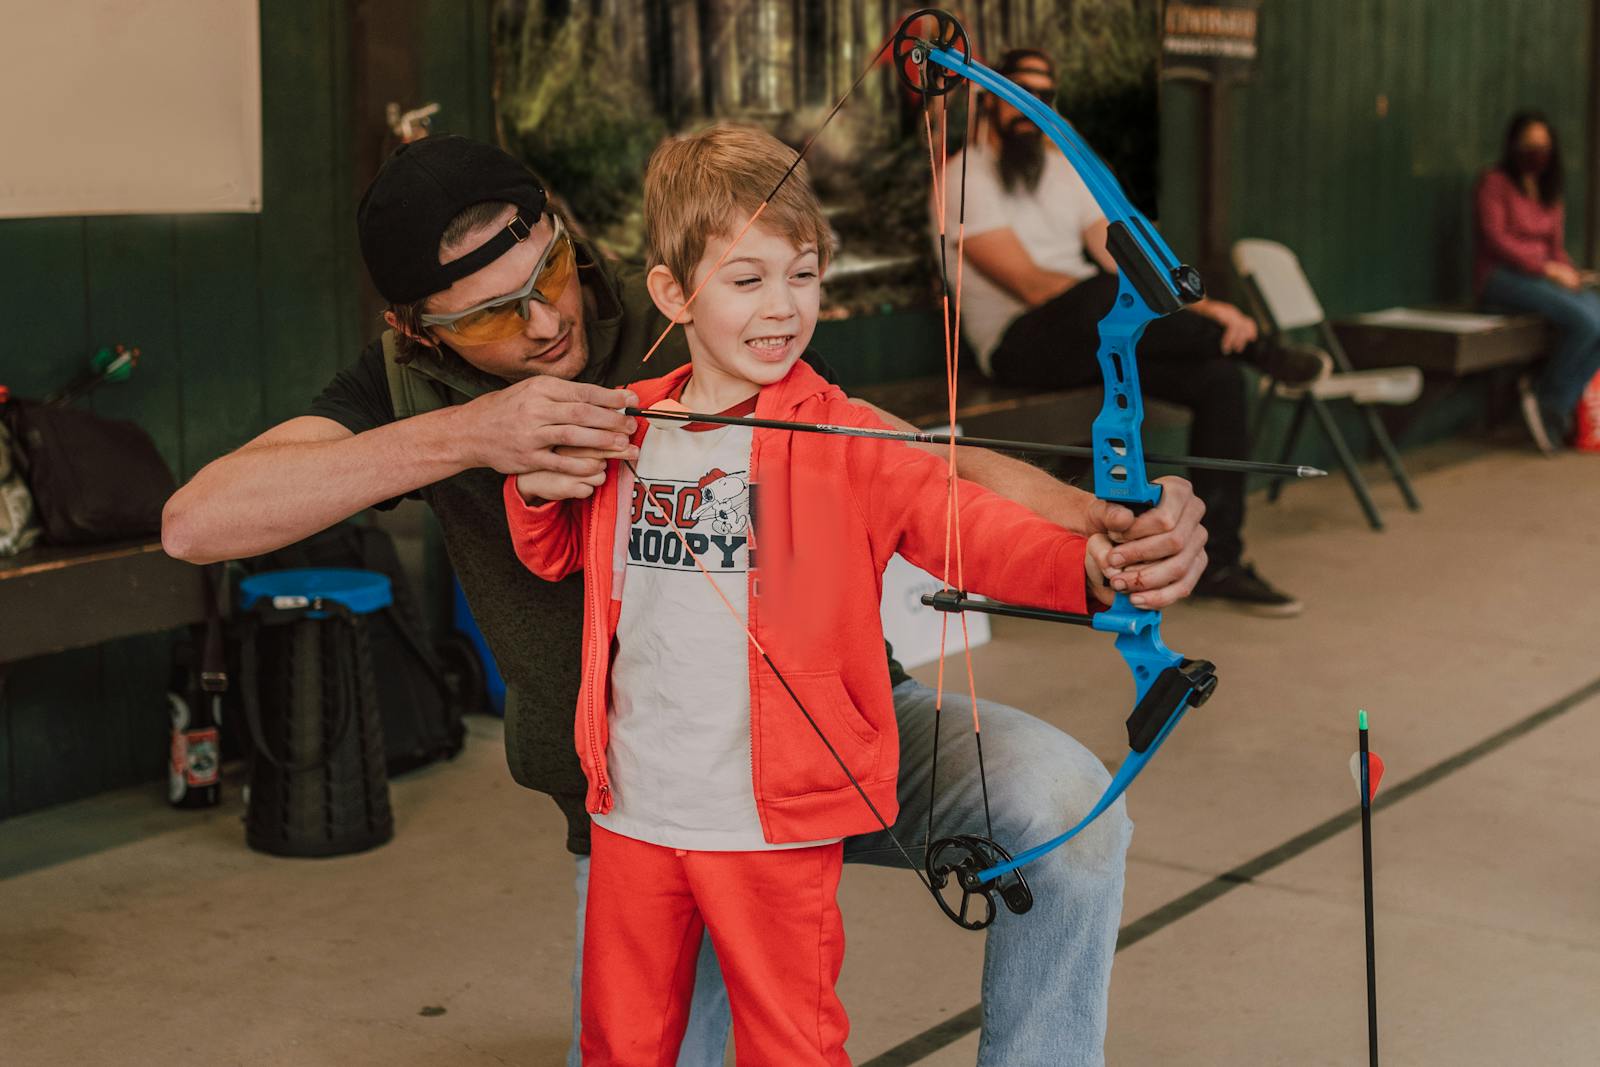
Part of the complete guide: How to improve your archery score
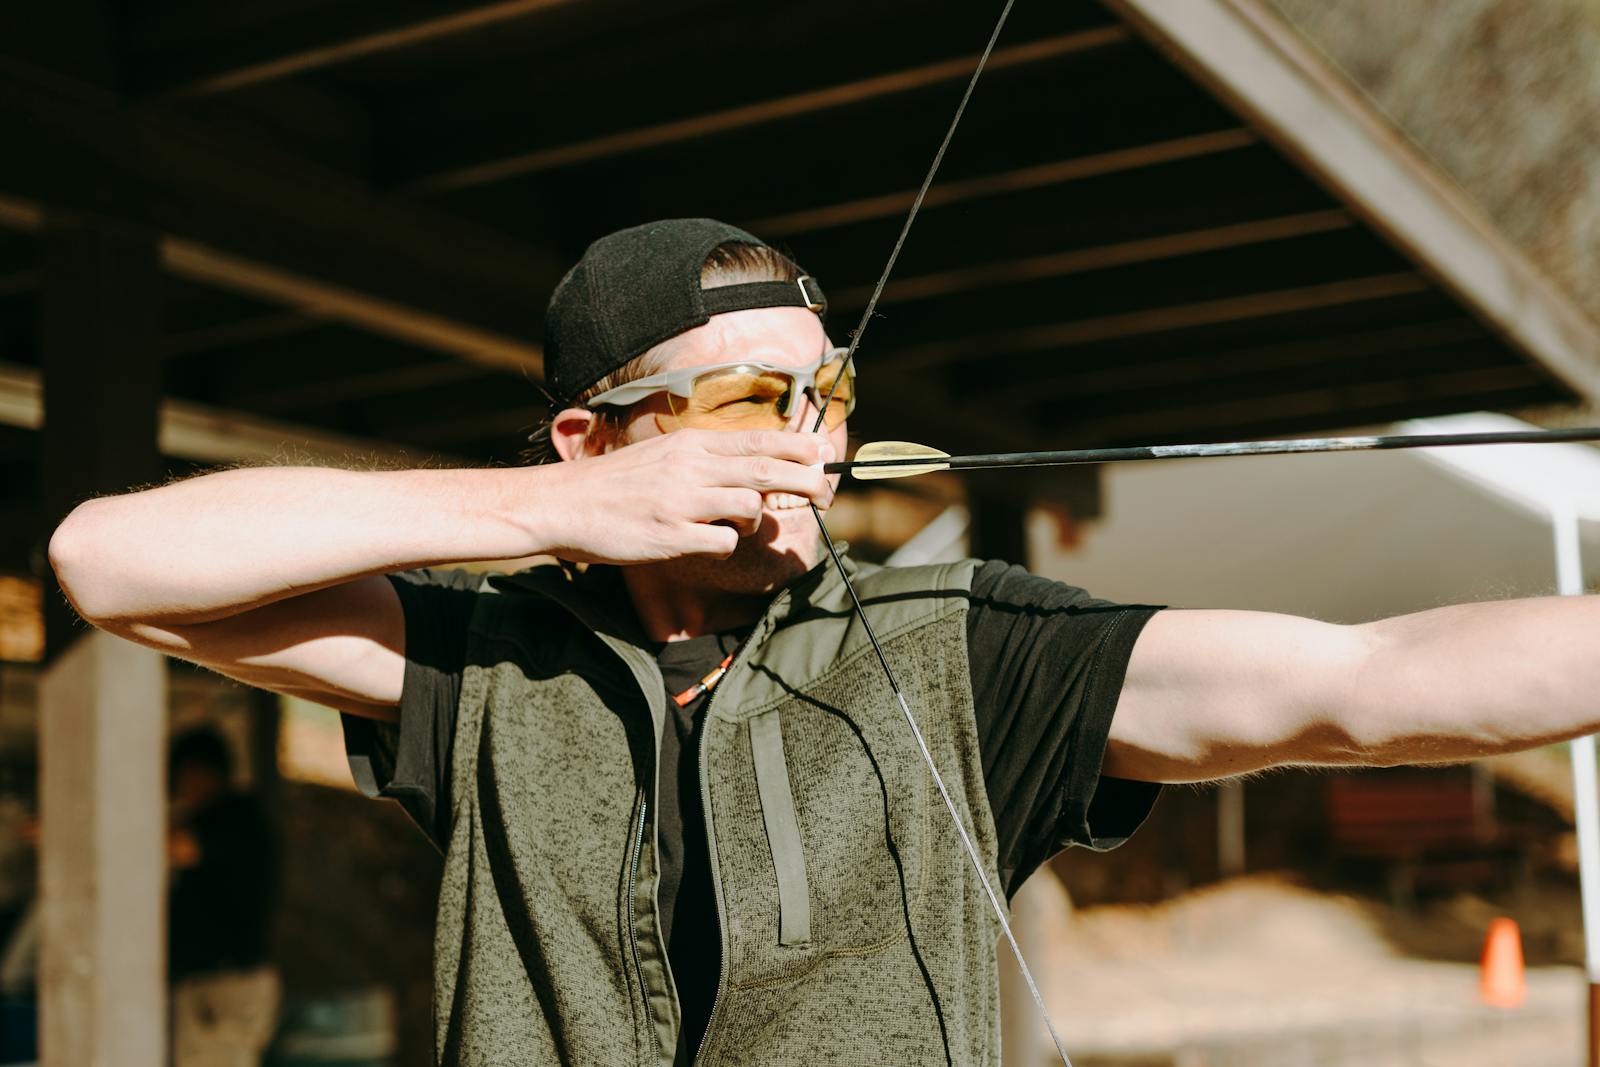
A working anchor needs at least three contact points: in recurve, index finger under the chin, string to nose, string to lip. Three points fix the position uniquely; one leaves too many degrees of freedom. By a geometric estimate, 1 mm of deviation at the contact point becomes roughly 5 cm on the target at 70 metres. In compound the anchor moves back to the jaw and adds the peep sight as a second reference.
The anchor point is the stable contact between the draw hand and the archer's face. It is one of the simplest things to explain, the hand touches a precise point on the face at full draw, and among the hardest to reproduce identically every time. A few millimetres of variation from one arrow to the next can move the arrow's point of impact by several centimetres on the target at 70 metres, at least by a geometric estimate.
Biomechanics research and elite practice agree on one thing: the anchor is the first stable geometric reference the motor system builds, and it is almost always the last one to degrade, even in experienced archers. This article covers what makes an anchor effective, what changes between Olympic recurve and compound, the most common errors seen in intermediate archers, and how to find the right anchor for your face and your structure.
What makes an anchor genuinely effective
An anchor that works has four characteristics, drawing on both research and practice, and none of them is optional: without all four the anchor remains a weak reference that cannot sustain shot repeatability.
These four characteristics together produce an anchor the nervous system can repeat with great consistency. Without that stability, every arrow leaves from a slightly different geometry, and the point of impact on the target becomes intrinsically variable even with the cleanest release.
The anchor in Olympic recurve
In Olympic recurve the classical anchor has three contact points, and the first is the index finger under the chin, typically at the level of the jaw. The second is the string to the nose, ideally at the centre or slightly to the left for a right-handed archer; the third is the string to the upper lip or corner of the mouth, depending on the archer's facial structure.
Together these three points define a stable geometry: the finger under the chin fixes the arrow height relative to the eye; the string-to-nose contact locks lateral alignment; the string-to-lip contact anchors how far the string is drawn back relative to the face. These are three references that, taken together, define the arrow's departure position with great precision.
A detail that is often overlooked is where the thumb and middle finger of the draw hand rest. In elite archers these two fingers contact the cheek or jaw at specific points, adding secondary references, whereas in intermediate archers those points tend to shift and the whole anchor becomes less rigid.
The anchor in compound
In compound the anchor is a different matter, because the mechanical release and the wider valley shift the primary contact back: typically the knuckle or back of the hand below the ear or along the posterior jaw. The string touches the nose, or a kisser button (a small bead attached to the string), and sometimes the cheek.
Compound geometry also adds a second reference, the peep sight, through which the eye aligns and which therefore becomes a visual reference as well as a physical one. This dual engagement, physical and visual, generally makes the compound anchor more stable, even if the setup is more complex to tune.
The trade-off is that it all depends on the calibration of the peep and kisser: if these accessories shift or wear, the anchor loses precision even when the motion itself is perfect. Regular maintenance of these components is, in practical terms, part of building a reliable compound anchor.
Four common anchor errors
Working with intermediate archers, certain errors come up repeatedly, and recognising them is the first step toward building a more reliable anchor.
Floating anchor height
The finger contacts the face, but at a slightly different height from one arrow to the next. This shows up as vertical variation in the impact pattern on the target (high arrows and low arrows with no discernible pattern).
Typical cause: inconsistent contact pressure or muscular tension in the hand. Fix: work on consistent pressure with short-distance drills performed with eyes closed.
String lifting away from the face
The string should contact the nose and lip consistently. When it lifts away even a few millimetres during aiming, the anchor loses one of its three reference points.
Cause: insufficient scapular expansion reducing effective draw depth. Fix: targeted work on the posterior draw synergy using a resistance band.
Premature anchor
The archer reaches the anchor before the draw is complete, then continues drawing and destabilises the contact in the process.
Cause: disrupted timing in the pre-shot routine. Fix: break the raise into phases (raise, draw, anchor, expand, release) and time each one deliberately.
Anchor drift over time
The anchor established six months ago differs from the current one, without the archer noticing. Natural drift caused by the absence of feedback.
Cause: no video or photographic reference. Fix: record 24 arrows every three months and compare anchor geometry over time.
How to find the right anchor for your structure
The textbook anchor is a starting point, not a mandatory destination. Facial structure, arm length, and jaw shape vary from person to person, and the right anchor must adapt to your anatomy, not the other way around.
Building one to fit goes through three stages, and the first is observing your structure: finger length relative to the hand, chin shape, where the nose sits relative to the jaw. These observations quickly reveal which contacts are natural and which are being forced.
The second is guided exploration: testing three or four variations in short sessions of eight to twelve arrows each, comparing consistency, comfort, and the groups produced. Ideally the work is done with a coach alongside, but it can be done alone with video and a training diary.
The third is stabilisation of the chosen variation: several weeks of deliberate practice on that geometry, the time needed for the motor system to consolidate it. Changing your anchor is neural learning, not an adjustment you make today and have ready tomorrow.
The anchor and distance-related variations
A subtle but important point: some archers use slightly different anchors depending on distance, particularly outdoors. At shorter distances (18 to 30 metres) a lower anchor helps depress the sight picture; at longer distances (50 to 70 to 90 metres) a higher one makes elevated shooting more comfortable.
The literature is divided on this: some coaches recommend a single fixed anchor and adjust aim through sight clicks, while others argue that micro-variations are inevitable and may as well be codified. Elite practice leans toward the first approach: one anchor for all distances, with the sight doing the adjusting while all technical references stay fixed.
For intermediate archers the rule is simple: one anchor, always the same. Micro-variations add technical noise, not precision. Only archers at the highest level, with thousands of arrows at specific distances, can afford intentional differentiation without losing consistency.
When and how to rebuild the anchor
Changing an already consolidated anchor is a delicate operation, one that is warranted only when there are genuine reasons, an injury that alters anatomy, a change of bow division, a chronic and documented technical problem, and only when it is approached knowing from the outset that it takes time.
The process typically requires 6 to 12 weeks of deliberate work. The first two weeks are spent simply feeling the new anchor under easy conditions: short distances, low volume. From weeks three to six, volume is built while holding the new pattern. From weeks seven to twelve, the new anchor is tested under progressively more demanding conditions, including competition simulation.
During this period scores almost always drop, temporarily, and that is normal, because it is the cost of reconstruction. Expecting immediate improvement leads to reverting to the old anchor before the new one has taken hold, and weeks of work are wasted. The quality most needed here, more than any other, is patience.
Diagnosing anchor problems from the shot pattern
The way arrows group on the target often reveals anchor problems before the archer is aware of them. Reading the target is a powerful diagnostic tool, and a free one.
Systematic vertical spread (arrows high and low but in a column) suggests variation in the height of the finger-to-chin contact. Horizontal spread (arrows left and right) indicates a lateral variation, usually in the string-to-nose contact. Diagonal spread often points to head rotation during aiming: a mixed anchor and posture problem.
When arrows drift consistently in the same direction throughout a session, for example progressively lower, the cause is almost always muscular fatigue altering the anchor. That is the signal that the session volume exceeds current capacity, and that the posterior chains need strengthening.
A second tool is comparing the first dozen arrows with the last dozen of the session. If consistency visibly degrades the anchor is not solid enough, whereas if it holds through the final arrow the anchor is well built and any remaining problem lies elsewhere: release, aim, or mental execution.
Maintaining the anchor over time
A well-built anchor does not stay that way on its own, because it tends to fray slowly, and keeping it reliable over time requires active maintenance: three habits in particular prove effective.
The first is a video check every three months: 24 arrows under normal conditions, comparing departure geometry, draw depth, and facial contacts against the original baseline. If something has shifted, a consolidation cycle brings everything back to standard before the deviation becomes a new stable pattern.
The second is return from a break, because after weeks without shooting, whether through injury, holiday, or other commitments, the anchor loses precision. The first two or three sessions back should focus on recovering geometry, not accumulating volume. Returning to normal arrow counts before the anchor is stable only reinforces compensations.
The third is periodically reassessing your own physical structure: changes in weight, posture, and mobility alter the geometry of the face and neck, and with it the optimal anchor. An annual check with a coach reveals whether the anchor currently in use is still the best fit for the body as it is today, or has quietly become sub-optimal.
The anchor in traditional and instinctive archery
In traditional archery, longbow, barebow recurve, and instinctive shooting, the anchor changes in character. There is no sight to provide an external reference: aiming is built entirely through proprioception and the body's muscular memory. The anchor therefore becomes even more important, because it is the only geometric reference that allows the brain to self-calibrate aim.
Traditional archers typically use a higher anchor than Olympic recurve, often with the index finger at the corner of the mouth or below the cheekbone. This brings the arrow into the visual line of sight, the approach known as under-eye shooting. In these divisions, even a variation of a few millimetres in the anchor can shift the arrow considerably on the target even at close range, precisely because there is no sight to compensate.
If you practise more than one division, Olympic recurve during the week and a few traditional sessions now and then, the healthiest approach is to maintain separate, dedicated anchors. Trying to unify them creates confusion that degrades both, so one anchor per division, each trained on its own terms, is the more reliable path.
The anchor is the archer's geometric signature.
More than any other technical element, the anchor defines where each arrow begins. When it is stable, everything else can be built on top of it. When it is not, no subsequent adjustment produces results that last. It deserves more attention than it typically receives.
Frequently asked questions
What makes an anchor genuinely effective?
Four characteristics together, drawing on both research and practice. Multi-point contact, at least three points that define position in space. Consistent pressure, as identical as possible from arrow to arrow. Repeatability under fatigue, which has to hold up on the last arrows of a session too. And anatomical compatibility: the anchor has to adapt to your facial structure, not the other way around. Without these four, it stays a weak reference.
What are the contact points of the recurve anchor?
In Olympic recurve the classical anchor has three points. The index finger under the chin, usually at the level of the jaw. The string to the nose, ideally at the centre or slightly to the left for a right-handed archer. And the string to the upper lip or the corner of the mouth, depending on the face. Together, these three points fix where the arrow leaves from: the height, the lateral alignment, and how far the string is drawn back relative to the face. The more consistent they are, the more the departure repeats the same way.
How much does an error of a few millimetres at the anchor matter?
It matters a great deal, and it is mostly a question of geometry. The target is far away, the contact point is very close to the eye: a small shift in the departure point widens along the whole trajectory. As an order of magnitude, a geometric estimate suggests that around 1 mm of variation at the anchor can translate to a few centimetres on the target at 70 metres. Do not take it as a laboratory number: it is an estimate meant to convey why a few millimetres, repeated poorly from one arrow to the next, really do show up on the target.
How do you find the right anchor for your structure?
In three stages. First observe your structure: finger length, chin shape, where the nose sits relative to the jaw. Then guided exploration: test a few variations in short sessions, comparing consistency, comfort, and groups. Finally stabilisation: several weeks of deliberate practice on the chosen variation, because setting a new anchor is motor learning, not an adjustment you make today and have ready tomorrow.
Is it better to use a different anchor for each distance?
For intermediate archers the practical rule is just one: a single anchor, always the same, with the aim adjusting through the sight clicks. Micro-variations add technical noise, not precision. Only archers at the highest level, with thousands of arrows at specific distances, can afford to differentiate them intentionally without losing consistency.
Further reading. What you read here rests on the scientific literature. To keep the text readable I do not cite individual studies inline, but you will find the full reference list, over 120 studies and books, on the dedicated page.
Go to the bibliographySome things I take on directly.
I work on training and functional rehabilitation, on injury prevention and recovery, and on research. If you have a project or a collaboration in mind, or a question left over from what you have just read, write to me: I answer myself.